Table of Contents
Setting a Static IP Address on your TetherBox
Tip: Before configuring a static IP, consider using a DHCP reservation on your router instead. Assign the TetherBox's MAC address a fixed lease so it always gets the same IP from DHCP. This is simpler to manage and means the TetherBox will still connect automatically if the network changes. See Connecting your TetherBox to the Internet for details.
If a DHCP reservation is not an option, you can configure a static IP directly on the TetherBox using its offline interface.
Accessing the Network Settings
Enter the IP address of your TetherBox into your browser's address bar. Your TetherBox's current IP address is visible in Admin → TetherBoxes → select your unit.
Logging In
Log in using your TetherBox token, which is available from your user profile in the top-right corner of the TetherX platform.
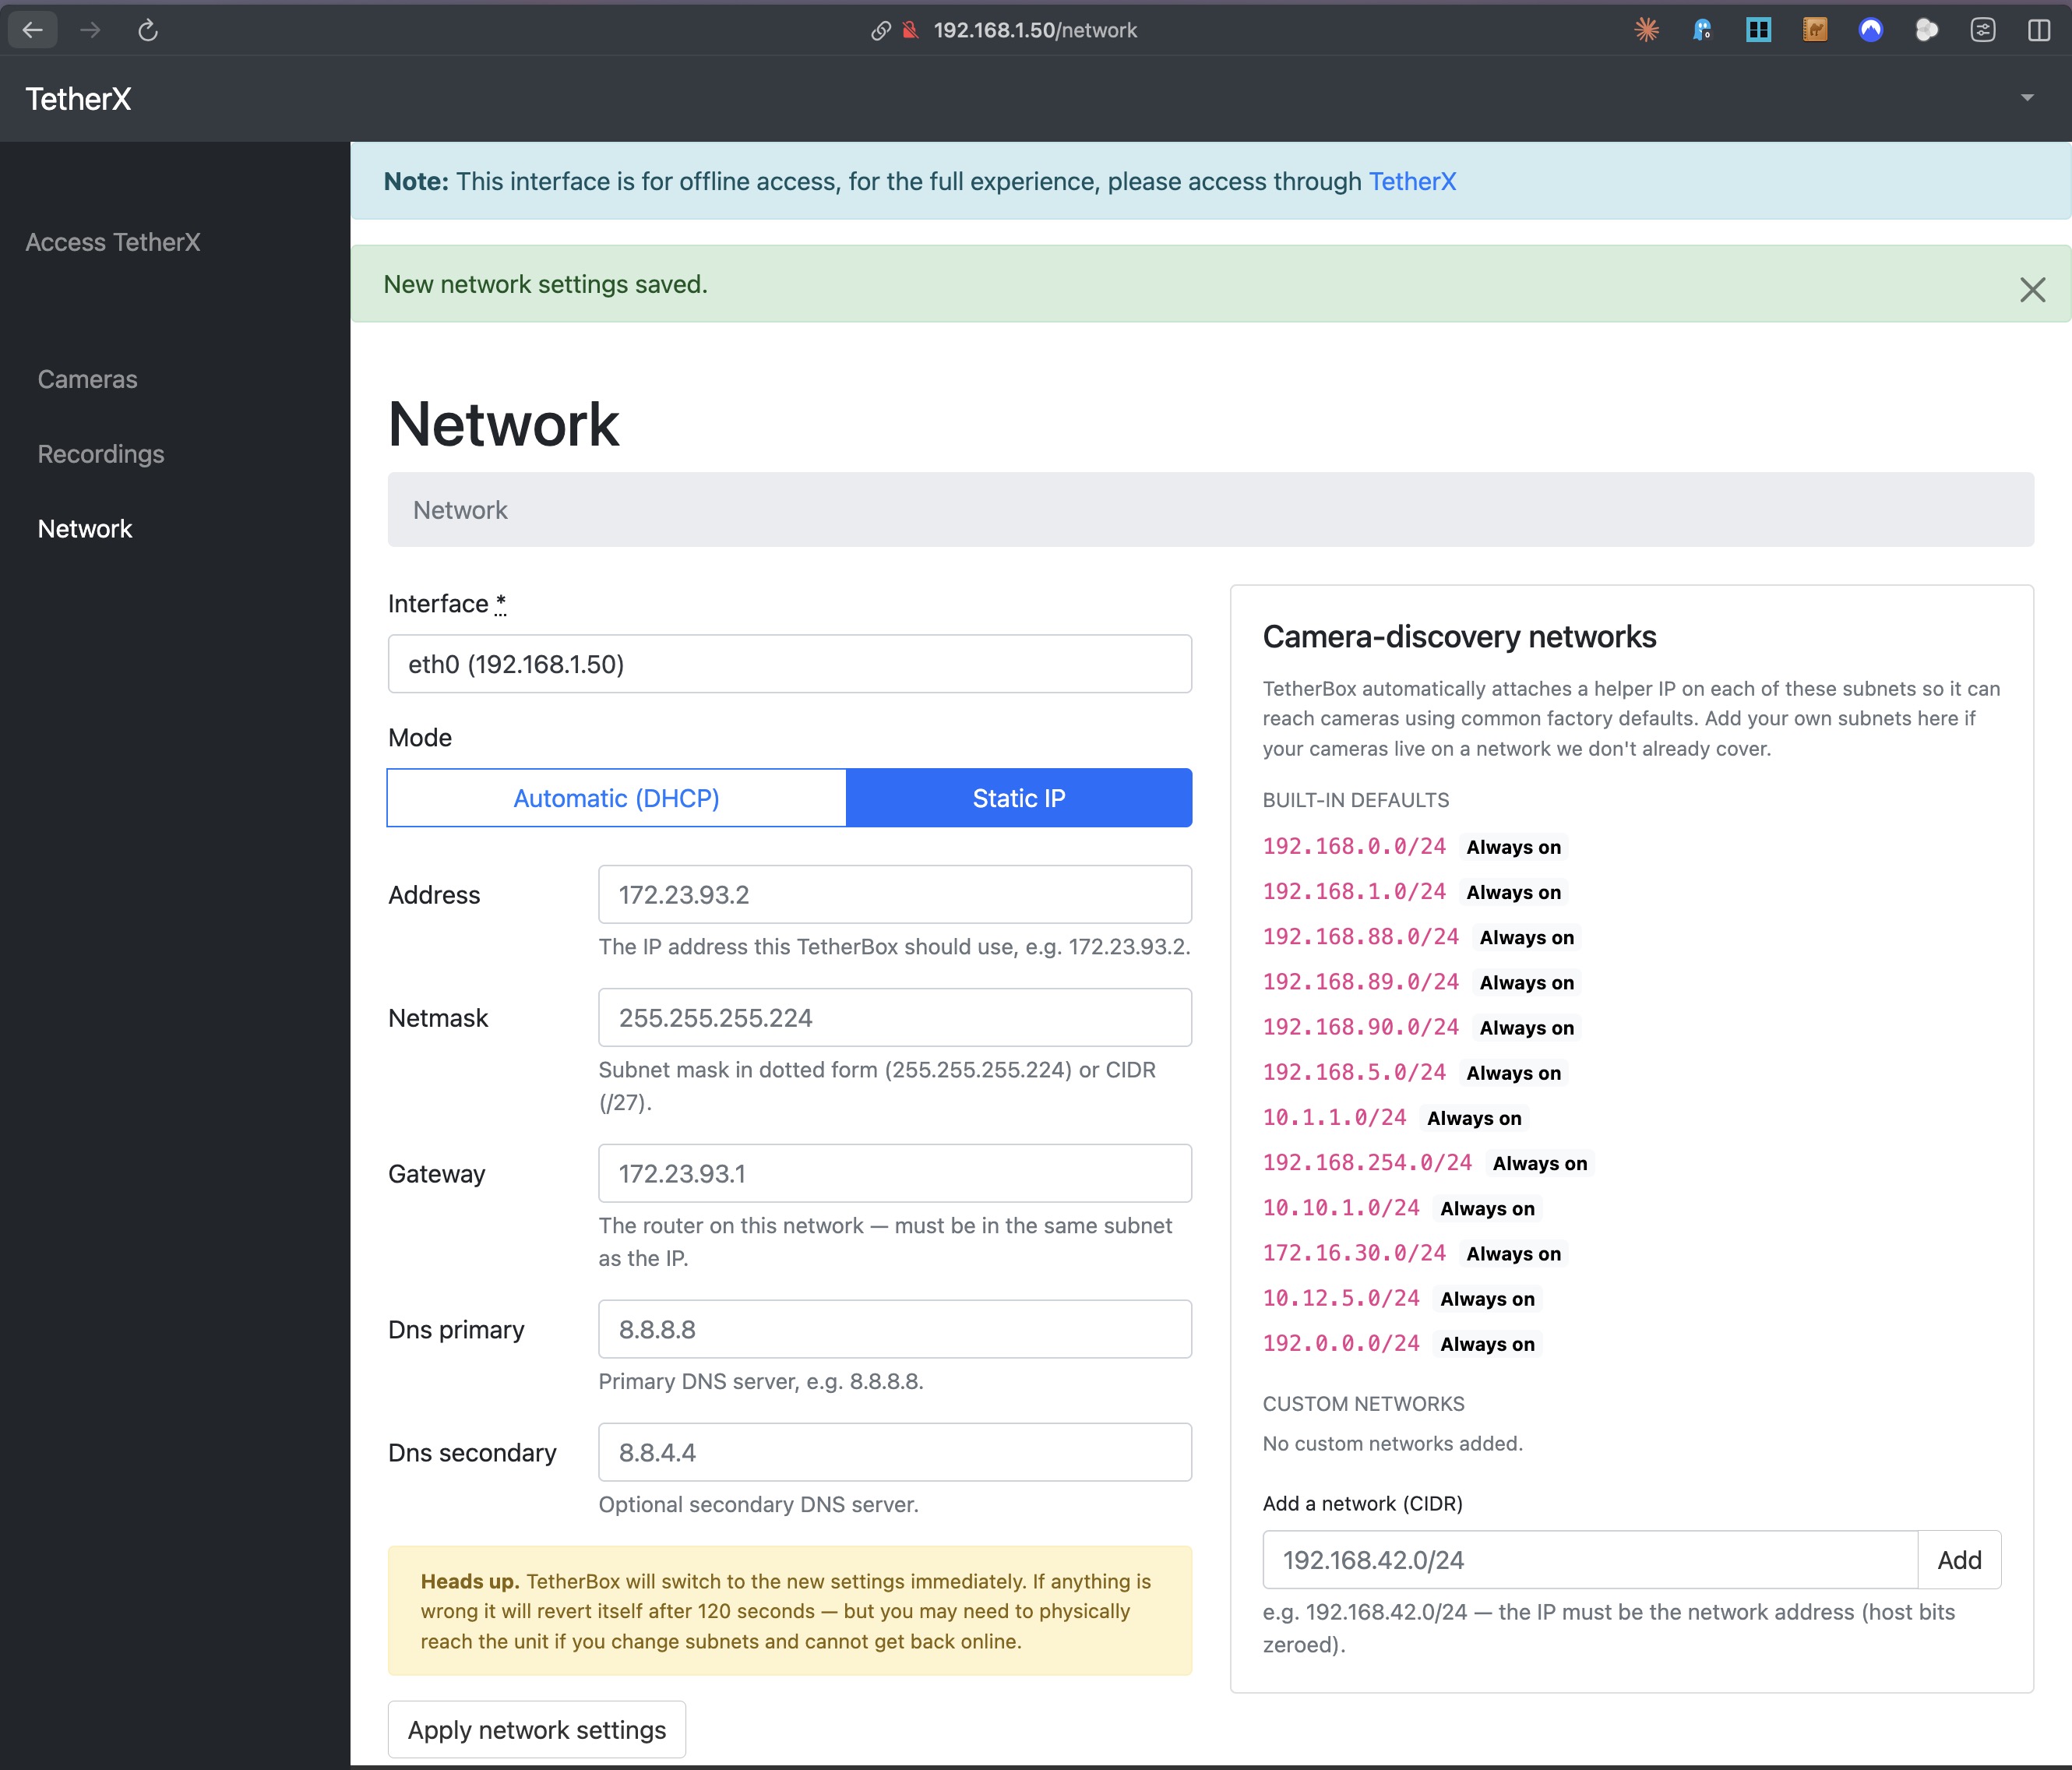
Configuring the Network
- Select Network from the menu on the left
- Switch the Mode to Static IP
- Fill in the required fields:
- Address — the static IP address for this TetherBox
- Netmask — the subnet mask (e.g.
255.255.255.0) - Gateway — your router's IP address
- DNS Primary — primary DNS server (e.g.
8.8.8.8) - DNS Secondary — optional secondary DNS server (e.g.
8.8.4.4)
- Click Apply network settings
Warning: The TetherBox will switch to the new settings immediately. If anything is wrong, it will revert automatically after 120 seconds — but you may need to physically reach the unit if you change subnets and cannot get back online.
Related Articles
- Connecting your TetherBox to the Internet — Network requirements and DHCP reservation setup
- Emergency Console Login — Last-resort option if the TetherBox is unreachable over the network
- TetherBox Troubleshooting — Diagnose connection and health issues
Referenced in: